1. There are always more things that can be learned, but i think we covered the majority of the software. With all the freedom we were given with these projects it allowed us to look up many tutorials on our own and learn from trial and error, what the different tools do to a piece. The final project was a real testament to that in the way, using our previously learned skills to make another, final project. It might have been the easiest project done having been the last, being so accustomed to the software.
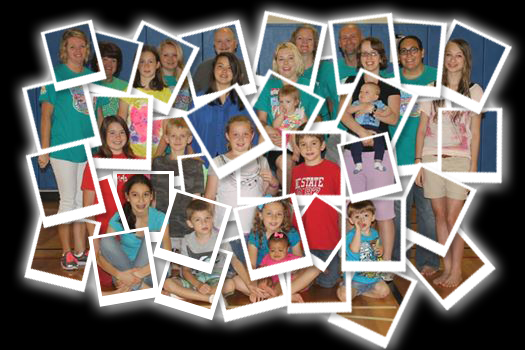
This Polaroid picture is one of my favorites but also one of my most successful. Though it was a minor project it took many components, and layers. I chose a picture with a larger subject and it took more to cover all of it. It turned out well enough that I can say its my best piece, mostly because it also incorporates a little of myself and friends into the piece.
GIF turorial
1. Click: File>New
2. Change units to inches. Change the background to transparent. Make a 6x6 box.
3. Go to Window>workspace>motion. If motion is already checked click: reset motion.
4. Make a new layer, fill using a dark blue.
5. Click on the gradient tool, at the top on the gradient scale, range from dark blue to black.

6. Starting in the center of square and down, make the gradient.
7. Click on shapes>custom shape. Choose the star shape and draw about three or four.
7. Click on shapes>custom shape. Choose the star shape and draw about three or four.
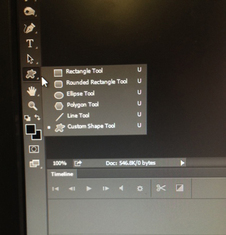
8. You can change the fill color to white. Change the shape to the moon and draw one. These shapes should all be separate layers.
9. Now create a new layer, fill in a lighter blue. Hide all other layers except for transparent layer.
10. Again click gradient, Change the range to the light blue to a darker blue. From center of square make gradient.
11. Click on shape> custom shapes, choose the cloud shape. Draw two or three small clouds.
12. Now choose the sun shape and draw. You can change the fill color to yellow.
13. Once you have created all the shapes go down to the bottom of the screen and click Create frame animation.
14. Hide all of the layers including the light blue, clouds and sun.
15. Re Highlight the dark blue background layer ONLY, so that it is visible. You should see it in frame 1.
16. Create new frame, and with background layer re highlight the stars.
17. New frame, re highlight moon. Move the stars and moon around until it’s at the far left side of the square.
18. Make a new frame and move the moon slightly to the right. Also rotate stars slightly for bonus effect.
19. Repeat previous step until the moon is on the far right side of the square.
20. Now hide all of the layers, re highlight the light blue background layer ONLY.
21. Repeat steps 16-19 for the clouds and sun.
22. At the bottom of each frame change the time to 0.5 seconds. And the loop to forever.
23. Click: the first day sky frame, at the bottom of the screen click the tweens button. Check only opacity, previous layer, and insert only 1 slide.
24. Click: File>Save for web. Change to GIF, change the loop to forever, and save.

 RSS Feed
